DIY vs Professional Epoxy Garage Floor: Cost & Quality Compared
Should you coat your garage floor yourself or hire a professional? It's a question that comes down to your budget, your comfort with hands-on projects, and how forgiving the coating system is of imperfect technique. This guide gives you an honest, detailed comparison so you can make the right call for your situation — without the bias of someone trying to sell you a kit or a coating service.
Cost Comparison
Cost is the primary reason most homeowners consider DIY. The savings are real and significant, but it's important to understand what you're comparing. Here's a breakdown for a standard 2-car garage (approximately 400 square feet):
| Category | DIY | Professional |
|---|---|---|
| Materials — Budget Kit | $150–$250 | Included in price |
| Materials — Mid-Range Kit | $250–$400 | Included in price |
| Materials — Premium Kit | $400–$700 | Included in price |
| Labor | $0 (15–25 hours of your time) | Included in price |
| Tools & Rentals | $0–$100 | Included in price |
| Total | $150–$800 | $1,500–$7,000 |
The professional range is wide because it depends on the coating system used. A basic 2-coat epoxy with flake runs $1,500-2,500. A premium polyaspartic/polyurea full broadcast system with diamond grinding runs $4,000-7,000. Some contractors also charge more based on the condition of your existing concrete — cracks, moisture issues, and old paint all add to the prep work and cost.
Use our epoxy floor calculator to estimate your specific DIY material cost based on your garage dimensions and chosen system.
Time Investment
Time is the hidden cost of DIY that many homeowners underestimate. Here's a realistic timeline for each approach:
DIY Timeline: Day 1 is entirely prep work — clearing the garage, cleaning the floor, degreasing, acid etching or grinding, rinsing, and letting it dry. This takes 4-8 hours depending on the floor condition and size. Day 2 is coating day — mixing, applying the base coat, broadcasting flakes (if applicable), and cleaning tools. This takes 3-5 hours. Then you wait: 72 hours minimum before light foot traffic, and 7 full days before parking vehicles on the floor. Your total active work time is 15-25 hours spread across 2-3 days, plus a week of cure time where the garage is out of commission.
Professional Timeline: Most professional installers complete the job in 1-2 days. Day 1 is prep and base coat (they use industrial diamond grinders that work much faster than hand methods). If using a fast-cure polyaspartic system, they may apply all coats on the same day. Many professional systems allow vehicle traffic in 24-48 hours rather than the 7 days typical of DIY epoxy kits. This speed difference matters if you can't afford to have your garage out of service for a week.
One factor people overlook: weather. DIY epoxy requires garage temperatures between 55-85°F with low humidity during application and curing. In many climates, this limits you to spring or fall weekends. Professionals using polyaspartic systems can work in a wider temperature range, giving them more scheduling flexibility.
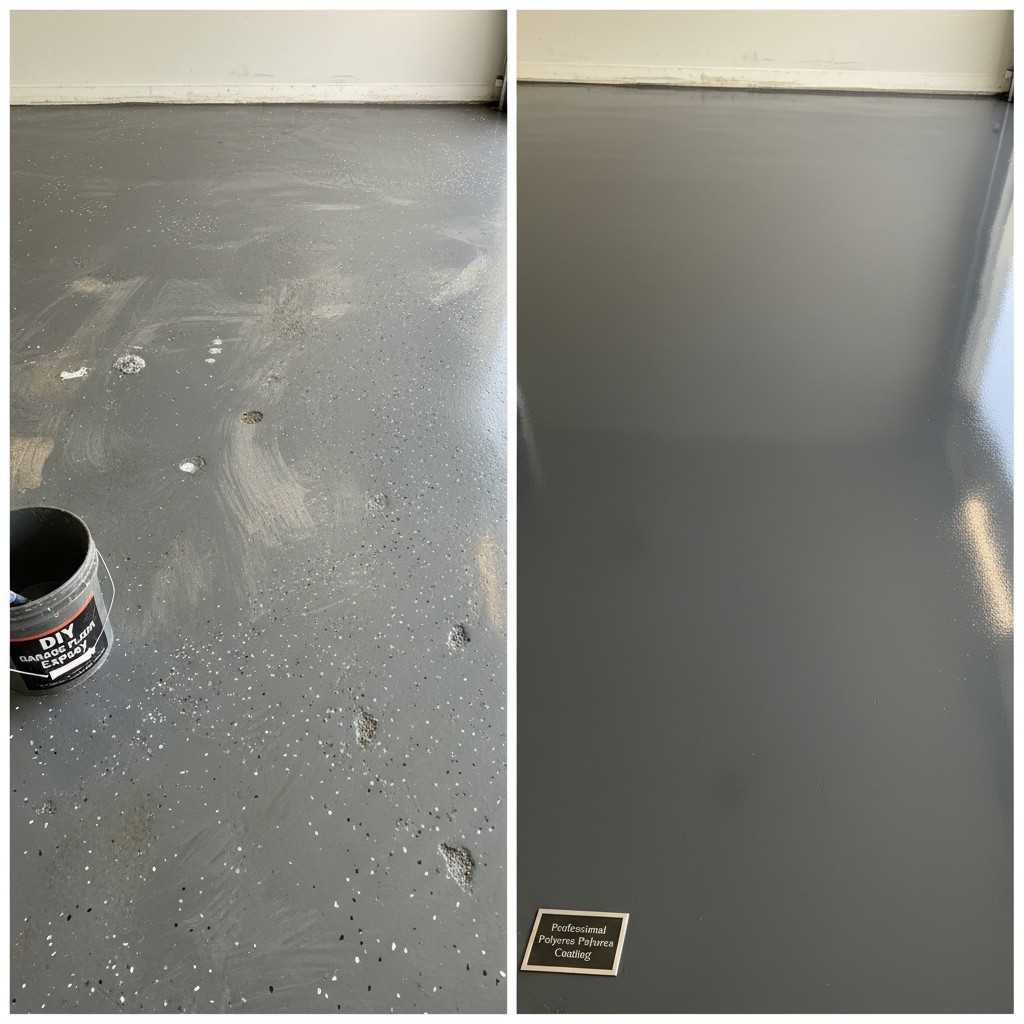
Quality Difference
Here's an honest assessment: a careful, patient DIYer using a quality kit (polycuramine or 100% solids) and following instructions precisely can achieve about 80% of professional results. That remaining 20% comes from three things the pros have that you don't:
Commercial-grade products. Professionals use coating systems not available in retail stores — higher solids content, better adhesion promoters, and UV-stable formulations. These products are more durable and longer-lasting than consumer kits. They're also more difficult to apply, which is why they're not sold retail.
Diamond grinding. Professional surface preparation uses walk-behind diamond grinders that create a consistent CSP (Concrete Surface Profile) across the entire floor. This produces a dramatically better bond than DIY acid etching. Diamond grinding removes surface contaminants, opens the pores of the concrete, and creates a uniform texture that coating adheres to evenly. It's the single biggest quality difference between DIY and professional work.
Experience and technique. A professional installer has coated hundreds of floors. They know exactly how fast to roll, how much material to apply, how to cut in edges without lap marks, and how to broadcast flakes for even coverage. This experience shows in the finished product — fewer roller marks, more consistent thickness, and cleaner transitions at edges and joints. For a deeper look at the prep process, read our surface preparation guide.
That said, the 80% DIY result is still a dramatic improvement over bare concrete. If your primary goals are to have a clean, easy-to-maintain floor that looks great in your own garage (not a showroom), DIY quality is more than sufficient.
The cost of failure. This is the factor that doesn't show up in a simple cost comparison. If a DIY epoxy job fails — peeling, bubbling, or delamination — fixing it is expensive and miserable. You'll need to strip the failed coating (a full weekend of grinding), prep the concrete again, and recoat. The material cost to redo a failed job often exceeds $500-800, meaning you've now spent more than a mid-range kit while still having a DIY-quality result. Professional installations include warranties (typically 2-5 years) that cover adhesion failures.
Skill Level Required
Different coating systems demand different skill levels. Be honest with yourself about where you fall:
- Water-based epoxy: Beginner-friendly. Long working time (30-40 minutes), forgiving application, easy cleanup with water. The low risk matches the lower durability — it's a good learning project even if the coating only lasts a few years.
- Polycuramine: Intermediate. Moderate working time (20-30 minutes), requires more careful mixing and application. Products like Rust-Oleum RockSolid use this chemistry and include good instructions, but you need to work more methodically.
- 100% solids epoxy: Intermediate to advanced. Short working time (15-20 minutes), thicker consistency requires strong rolling technique, material is expensive (mistakes hurt financially). Best for experienced DIYers who've done at least one coating project before.
- Polyaspartic: Advanced. Very fast pot life (10-15 minutes in warm weather), requires rapid and confident application with no hesitation. There is essentially no room for error — if you stop to read instructions mid-application, the material will gel in the bucket. This is not a beginner project.
- Metallic epoxy: Advanced+. Beyond the technical application, metallic epoxy requires artistic sensibility. You're manipulating pigments in wet epoxy to create flowing, marble-like patterns. No two floors look the same, and the result depends entirely on your technique. Practice on plywood first.
When DIY Makes Sense
DIY is the right choice when most or all of these apply to your situation:
- Your budget is under $500 for the entire project
- You're reasonably handy and patient — willing to follow instructions step by step
- Your garage is small to mid-size (1-car or 2-car)
- You're using a water-based or polycuramine system (not polyaspartic)
- Your timeline is flexible — you can wait 7+ days for full cure and can work around weather
- You enjoy hands-on home improvement projects
- The concrete is in reasonable condition — no major cracks, moisture issues, or old coatings
If all of the above sounds like you, DIY is a satisfying project with real cost savings. Browse our best garage floor epoxy kits guide to find the right product for your skill level and budget.
When to Hire a Pro
Professional installation makes sense when any of these factors are present:
- Large or multi-car garages. The bigger the floor, the more working time pressure you face. A 3-car garage is very difficult to coat evenly before the material starts to set.
- You want a polyurea or polyaspartic system. These premium coatings deliver the best long-term performance but require professional technique. The fast pot life and specialized equipment make DIY risky.
- Your concrete has major damage or moisture problems. Cracks wider than 1/4 inch, spalling, or moisture vapor transmission above 3 lbs/1000 sq ft require professional assessment and repair before coating.
- You need the garage back in 1-2 days. If you can't be without your garage for a week, a professional polyaspartic system that allows vehicle traffic in 24 hours is the only option.
- You want a warranty. Professional installers stand behind their work. If the coating fails due to adhesion issues, prep problems, or product defects, a warranty gives you recourse.
- You've already had a DIY failure. If your previous DIY attempt peeled or delaminated, the concrete now has a history of adhesion problems. A professional can assess why it failed and take corrective measures that go beyond what's available to a homeowner.
How to Find a Good Epoxy Contractor
If you decide to hire a professional, the quality difference between contractors can be enormous. Here's how to separate the good ones from the ones who'll do a worse job than you could yourself:
Questions to ask every contractor:
- "What coating system do you use?" — A good contractor will name specific products and explain the chemistry (100% solids epoxy, polyaspartic, polyurea). If they just say "epoxy" without specifics, that's a concern. They should NOT be using water-based epoxy — there's no justification for a professional to use a consumer-grade product.
- "Do you diamond grind the concrete?" — The answer must be yes. Diamond grinding with a walk-behind grinder is the professional standard for surface preparation. If a contractor relies on acid etching, they're cutting corners. Acid etching is acceptable for DIY but not for professional work at professional prices.
- "What warranty do you offer?" — A reputable contractor offers at least a 2-year warranty on adhesion. Better ones offer 5+ years. Make sure the warranty covers labor, not just materials. Get it in writing.
- "Can I see recent work and speak with references?" — Any established contractor should be happy to show you photos or addresses of recent jobs. Ask references specifically about the prep process, communication, and whether they've had any issues since installation.
Red flags to watch for:
- Won't specify exactly what products they use
- Advertises "one-day epoxy" at an unusually low price — this usually means minimal prep and cheap materials
- Doesn't mention or plan to do moisture testing
- No written warranty or vague warranty terms
- Significantly undercuts all other bids (likely cutting corners on prep or materials)
- Pressures you to decide immediately or offers a "today only" discount
Get at least three quotes, and don't automatically pick the cheapest. The contractor who spends 30 minutes inspecting your floor, tests for moisture, explains their process in detail, and quotes a fair price is almost always the right choice — even if they cost more than the guy who gave you a number over the phone.
Related Reading
- Epoxy Floor Calculator — Estimate DIY material costs for your garage
- Garage Floor Epoxy Cost Guide — Detailed cost breakdown by system type
- How to Prep a Garage Floor for Epoxy — Step-by-step surface preparation
- Best Garage Floor Epoxy Kits — Top DIY kits compared