Polyaspartic Garage Floor Coating: Your 1-Day Install Guide
Polyaspartic coatings are what professional garage floor installers use when they promise a "one-day floor." The chemistry cures in hours instead of days, doesn't yellow in sunlight, and resists hot tire pickup that plagues cheaper epoxy. But is it realistic for a DIY project? Here's everything you need to know, including an honest assessment of whether you should attempt this yourself.
What Is Polyaspartic Coating?
Polyaspartic is a subset of polyurea chemistry. Specifically, it's an aliphatic polyurea, which means its molecular structure is UV-stable — it won't yellow or amber when exposed to sunlight. This is a key advantage over traditional epoxy, which uses aromatic amine chemistry that degrades under UV exposure.
The defining characteristic of polyaspartic coatings is their cure speed. While traditional epoxy takes 12-24 hours between coats and 72+ hours before vehicle traffic, polyaspartic coatings cure to a walkable surface in 2-6 hours and can take vehicle traffic in as little as 24 hours after the final coat. This rapid cure is what enables the "one-day floor" that professional installers advertise.
The chemistry also produces a harder, more chemically resistant film than standard epoxy. Polyaspartic coatings typically measure 75-85 on the Shore D hardness scale (compared to 70-80 for quality epoxy), and they resist common garage chemicals like brake fluid, gasoline, oil, and road salt better than most epoxies.
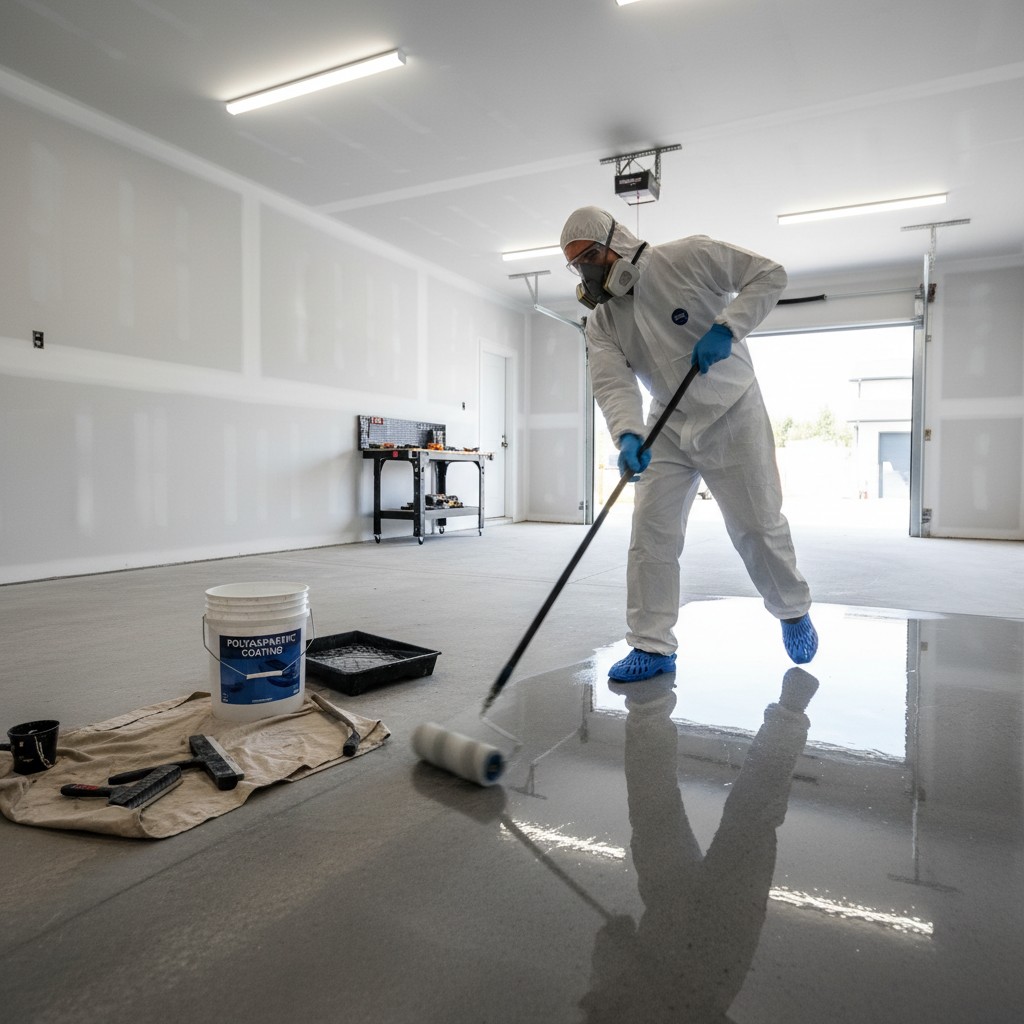
The trade-off? That fast cure time means a very short pot life — typically 30-45 minutes from mixing before the material starts to gel in the bucket. This is what makes polyaspartic coating challenging for DIY application and why most professional installers work in teams of 3-4 people.
Polyaspartic vs Epoxy: Side-by-Side Comparison
Understanding the differences helps you decide which chemistry is right for your garage. For an even deeper dive into coating types, check our full epoxy vs polyurea comparison.
| Feature | Polyaspartic | Epoxy |
|---|---|---|
| Cure Time (between coats) | 2-6 hours | 12-24 hours |
| Vehicle Traffic | 24 hours after final coat | 72+ hours after final coat |
| UV Stability | Excellent — will not yellow | Poor — yellows with UV exposure |
| Hot Tire Resistance | Excellent | Poor (water-based) to Good (100% solids) |
| DIY Cost (2-car garage) | $350-600 | $150-400 |
| Professional Cost (2-car) | $2,800-4,800 | $2,000-3,500 |
| Expected Lifespan | 15-20+ years | 5-10 years (water-based), 10-15 (100% solids) |
| DIY Difficulty | Hard — fast pot life, no room for mistakes | Moderate — slow cure = forgiving application |
| Odor During Application | Strong solvent odor — requires good ventilation | Low (water-based), Moderate (100% solids) |
| Temperature Range | Wide (can apply in 30-90°F) | Narrow (50-80°F recommended) |
| Coverage per Gallon | ~275 sq ft | 160-250 sq ft (depends on type) |
Cost Breakdown
Polyaspartic coating costs more per gallon than epoxy, but you typically need fewer coats and the labor time is shorter. Here's what to expect for both DIY and professional installations. For exact material quantities based on your garage dimensions, use our epoxy floor calculator (it handles polyaspartic calculations too).
DIY Cost: $350-600 for a 2-Car Garage
- Polyaspartic base coat: $90-120/gallon at ~275 sq ft/gal. A 400 sq ft garage needs about 1.5-2 gallons for one coat. ($135-240)
- Polyaspartic clear coat: Same price range, 1.5-2 gallons. ($135-240)
- Epoxy primer (optional but recommended): $50-70/gallon at ~325 sq ft/gal. ($50-70)
- Decorative flake: $25-60 for 20-40 lbs depending on coverage density.
- Application supplies: Rollers, mixing buckets, mixing drill attachment, spike shoes. ($30-50)
Professional Installation: $7-12 per Square Foot
For a standard 2-car garage (400 sq ft), professional polyaspartic installation runs $2,800-4,800 including surface preparation (diamond grinding), all materials, flake broadcast, and clear coat. The higher end of the range includes full-flake (complete coverage) systems with multiple clear coats.
Professional installation makes sense when you value the warranty (most pros offer 10-15 year warranties), want a guaranteed result, or have a large or complex floor (multiple levels, extensive crack repair, drainage issues). The professional premium covers not just materials and labor but also the diamond grinder, industrial vacuum, and experience that prevents costly mistakes.
For a full cost analysis across all coating types, see our garage floor epoxy cost guide.
Is DIY Polyaspartic Realistic?
Honest answer: yes, but it's significantly more challenging than DIY epoxy. Here's why:
The fast pot life is the main challenge. Once you mix the two components, you have about 30-45 minutes before the material starts to gel in your bucket. For a 2-car garage, that means you need to mix, pour, and roll out 275-400 square feet of coating in half an hour. There is no pausing to answer the phone, fix your roller, or figure out what you're doing next. You need a plan, you need your tools laid out and ready, and ideally you need a helper.
Temperature affects pot life. Warmer temperatures shorten it. At 90°F, your pot life may drop to 15-20 minutes. This is why many DIY guides recommend applying in the early morning or evening when it's cooler. Conversely, polyaspartic can be applied in much colder conditions than epoxy (down to about 30°F), which is an advantage for winter projects.
Practical tips for DIY success:
- Mix a small test batch first to understand the viscosity and working time before committing to the full floor.
- Pre-stage everything: rollers loaded in roller trays, pour lines marked on the floor, flake containers open and ready.
- Work with a partner. One person pours and spreads with a squeegee/notched squeegee while the other follows with a roller for final leveling.
- For large garages (500+ sq ft), mix and apply in two separate batches rather than one giant mix. Apply the first batch to half the floor, then immediately mix and apply the second half, slightly overlapping the wet edge.
- Wear spike shoes (spiked shoe covers, available at any coating supplier for ~$15) so you can walk on the wet coating without leaving footprints.
Application Steps: The 1-Day Process
Here's the step-by-step process for applying a complete polyaspartic garage floor system. Note that surface prep (grinding) happens the day before, so the "1-day" claim refers to the coating application itself.
Day Before: Surface Preparation
Step 1: Prep the floor. Mechanical grinding is strongly recommended for polyaspartic coatings. The fast cure time and high bond strength of polyaspartic demands the best possible surface profile (CSP 2-3). Acid etching may not provide sufficient profile for reliable adhesion. Grind the entire floor, vacuum thoroughly, and damp-mop to remove all dust. Let the floor dry overnight.
Day Of: Coating Application (6-8 Hour Timeline)
Step 2: Apply epoxy primer (optional — 7:00 AM). If your system includes a primer, apply it first. Many polyaspartic systems use an epoxy-based primer that provides an additional bonding layer and fills micro-pores in the concrete. Coverage: ~325 sq ft/gal. This needs 8-12 hours to cure, which is why it's sometimes done the evening before, or early morning the day of coating. The timing depends on your specific product's recoat window.
Step 3: Mix and apply polyaspartic base coat (3:00-4:00 PM, or when primer is ready). Measure components exactly per manufacturer instructions. Mix thoroughly for 2-3 minutes with a drill and mixing paddle. Pour immediately in ribbons across the floor. Spread with a squeegee or notched squeegee, then back-roll with a 3/8-inch nap roller for a smooth, even film. Work fast — you have 30-45 minutes.
Step 4: Broadcast decorative flake (immediately after rolling). While the base coat is still wet (within 10-15 minutes of application), broadcast your flake chips into the coating. For a light broadcast, toss small handfuls at a 45-degree angle. For full-flake, broadcast heavily until the entire surface is saturated with flake — you want to see no base coat visible, with excess flake sitting on top. The wet coating will grab and hold the flake as it cures.
Step 5: Let cure (4-6 hours). Allow the base coat to cure. In warm conditions (70°F+), this takes 4 hours. In cooler conditions, allow 6 hours. The surface should be hard and not tacky when you lightly touch it.
Step 6: Scrape excess flake (if full-flake). Use a floor scraper to knock down any protruding flake that didn't lay flat. Vacuum all loose flake and dust. The surface should feel uniformly rough but not sharp.
Step 7: Apply polyaspartic clear coat (8:00-9:00 PM). Mix and apply the clear coat the same way as the base coat. This seals the flake, provides the final gloss and chemical resistance, and creates the smooth, cleanable surface. Same 30-45 minute pot life applies. Roll thin and even.
Step 8: Cure times. Light foot traffic: 12-24 hours. Full foot traffic: 24 hours. Vehicle traffic: 48-72 hours. Full chemical resistance: 7 days. Don't rush the vehicle traffic timeline — the coating needs time to achieve full hardness.
Best Polyaspartic Brands for DIY
Not all products labeled "polyaspartic" are created equal. Here's what to know about the DIY market:
True polyaspartic kits: These are two-component systems with polyaspartic resin on both the base coat and clear coat. Brands like ArmorPoxy ArmorUltra (check price on Amazon), Polyaspartic.com, and Floor Armor offer genuine polyaspartic DIY kits. They cost more ($350-600 per kit for a 2-car garage) but deliver the full performance benefits: fast cure, UV stability, hot tire resistance, and 15-20 year durability.
Hybrid systems (epoxy base + polyaspartic top): Many professional-grade DIY systems use an epoxy primer or base coat with a polyaspartic clear coat on top. This is actually the most common professional system because the slower-curing epoxy base is easier to apply (longer working time) while the polyaspartic clear coat provides UV stability, hot tire resistance, and chemical resistance on the surface layer where it matters most. This is often the best approach for DIY users because you get a forgiving base coat application and a high-performance top coat.
What to avoid: Some big-box store kits are labeled "polyaspartic" or "polyurea" but are actually diluted polyurea blends with significantly lower solids content and performance than true polyaspartic. Read the technical data sheet (TDS), not just the marketing. Look for solids content above 70% and a Shore D hardness rating above 75. If the product doesn't publish a TDS, that's a red flag.
Before purchasing, check our roundup of the best garage floor coating kits for detailed comparisons and recommendations at every price point.
Is Polyaspartic Worth the Premium?
If you're planning to stay in your home for 10+ years and use your garage daily, yes. The combination of UV stability (no yellowing), hot tire resistance, rapid cure time, and a 15-20 year lifespan makes polyaspartic the best long-term value in garage floor coatings. You'll spend 2-3x more upfront than water-based epoxy, but you won't be recoating in 5 years.
If you're on a tight budget, planning to sell the home soon, or simply want to improve the look of your garage without a major investment, a quality water-based epoxy with a polyurethane top coat is a perfectly reasonable alternative at roughly half the cost.
Either way, the foundation of a long-lasting floor is proper surface preparation. No coating chemistry can compensate for poor prep. Start with our epoxy floor calculator to determine your exact material needs, and make sure you understand the full cost picture before committing to a system.